The Checkout Upsell Grid functionality enables the Kiosk to display a specific POS Screen Grid after the consumer presses the "CHECK OUT" button.
This functionality can be used as a method of "upselling" additional items to the consumer prior to taking payment.
The Upsell Grid can be useful to draw attention towards a product or service that is available that the consumer may have overlooked while they were placing their order (e.g. a range of new products or services that have recently been added to the menu).
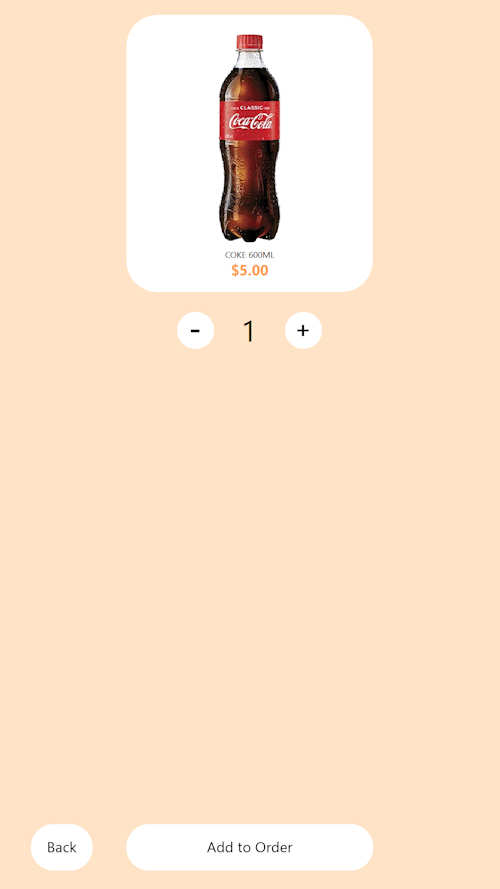
If the customer wants the product or service, they can press the button on the Upsell Grid to add the item to their order.
To configure this functionality, go to:
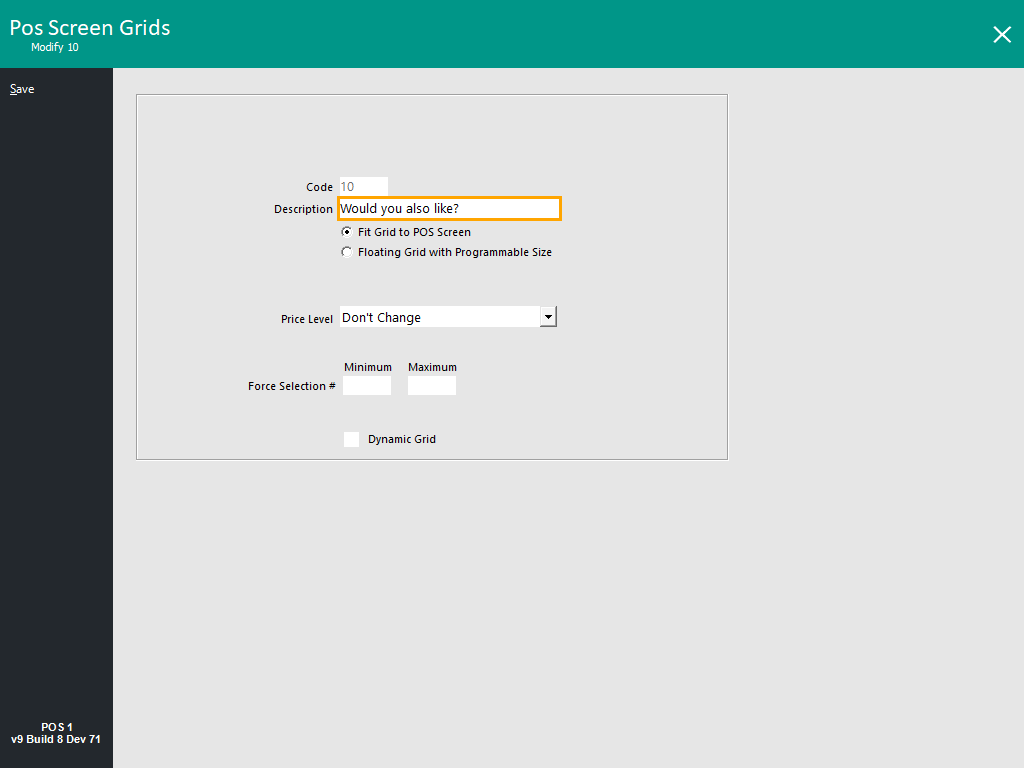
Back Office > Setup > POS Screen > Grids > Add.
The Description will be displayed at the top of the Kiosk when the Checkout Upsell Grid is triggered.
Therefore, a Description such as "Would you also like?" or "Have you considered?" can be used.
The Description field is limited to 30 characters.
Press the "Save" button on the top-left corner to save the new POS Screen Grid.
Close the Add New POS Screen Grids window, then select the newly created POS Screen Grid > Items.

Note that the Grid Layout is shown horizontally when configuring the buttons, whereas the Kiosk is displayed vertically.
Therefore, when adding Stock Items to the POS Screen Grid, add the items in a vertical fashion from top-down starting from the far left-hand side of the POS Screen Layout and working across the layout towards the right.
The Kiosk will display items in that order; noting that the Kiosk displays 3 items per row.
Search for the required items within the grid on the top-left corner and drag them to the desired button position, remembering the above info regarding the sorting of items on the Kiosk screen.
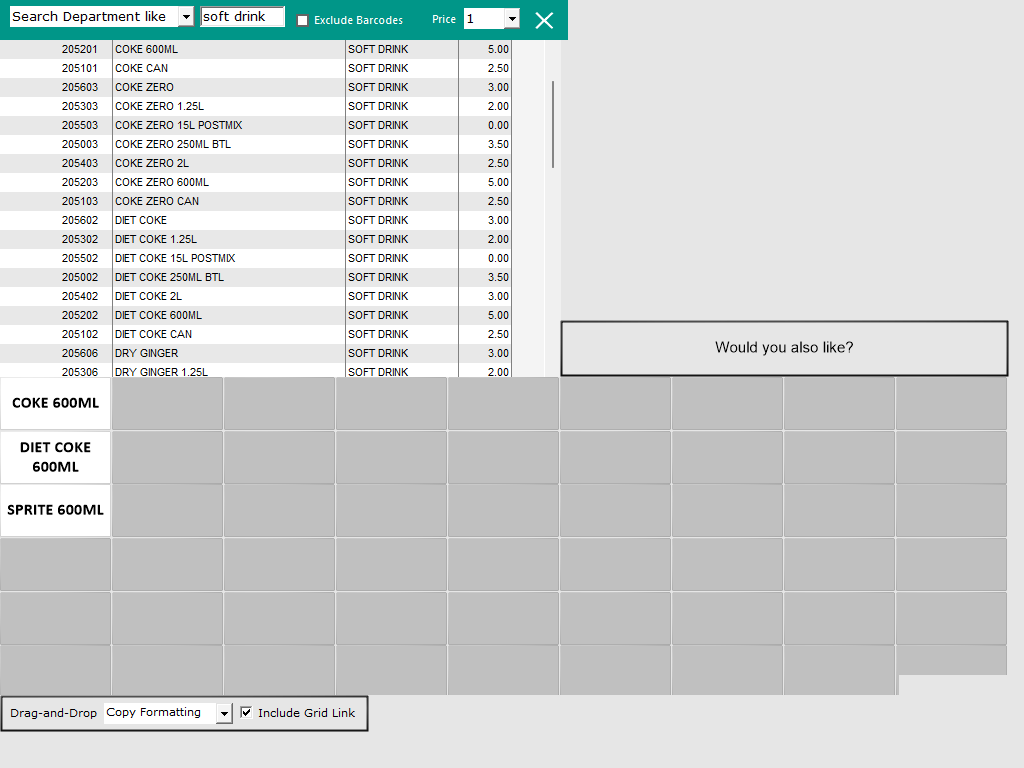
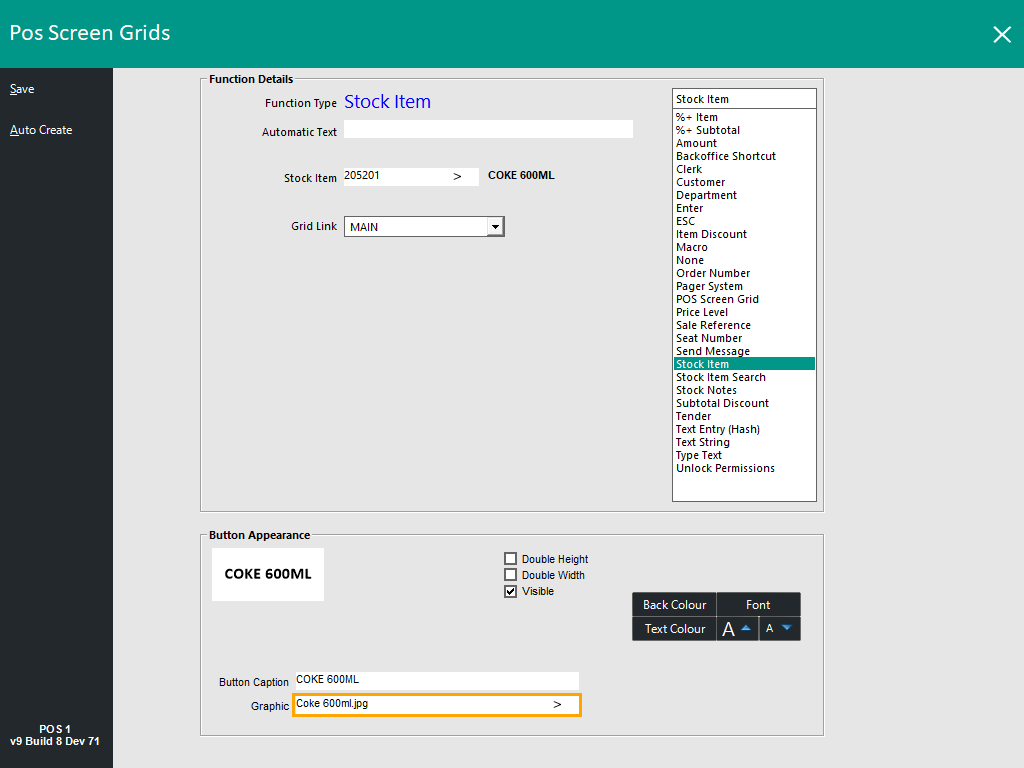
Images can be set for the items by clicking on each item in the POS Screen Grid and assigning a graphic in the Graphic field.
The images must be stored in the folder "C:\ProgramData\Idealpos Solutions\Idealpos\Pictures" on each POS Terminal/Kiosk.
Go to: Back Office > Setup > POS Terminals > Select the Kiosk POS Terminal > Modify > Display/Kiosk tab.
Within the Checkout Upsell Grid dropdown box, select the newly created POS Screen Grid.
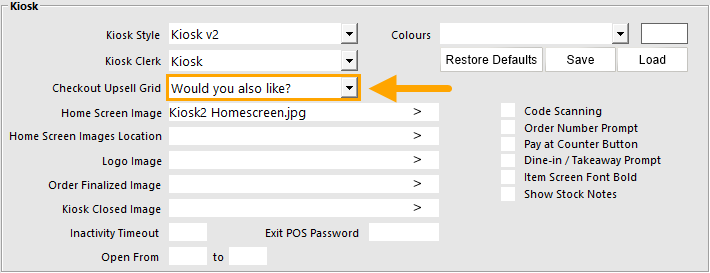
Close the Modify POS Terminal window.
If the venue or site contains multiple Kiosk Terminals, repeat the above step to set the Checkout Upsell Grid for each Kiosk Terminal that requires this functionality.
This change should take effect without restarting the Kiosk.
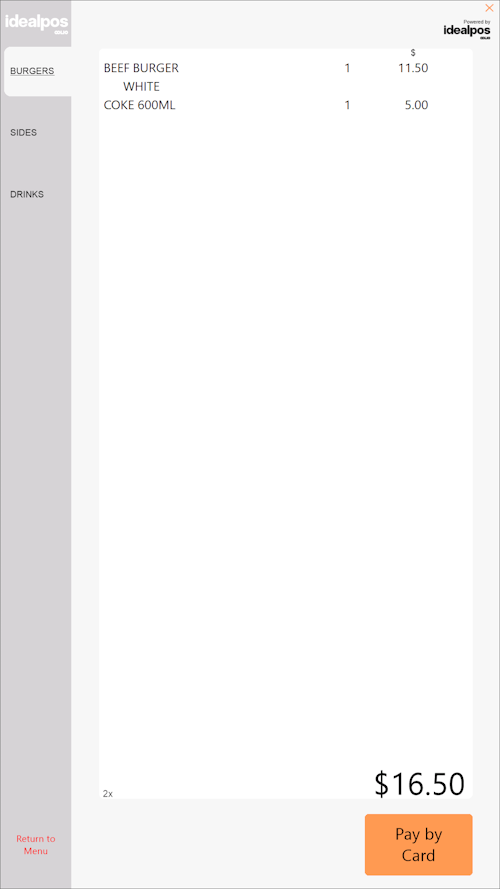
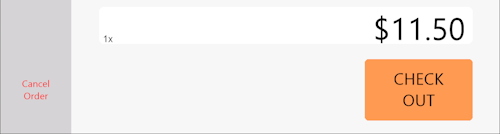
Go to the Kiosk and start a sale > Add an item to the order > Press the "CHECK OUT" button at the bottom of the screen.
The Checkout Upsell Grid is displayed.
Any items that are required from the Checkout Upsell Grid can be pressed and added to the sale.
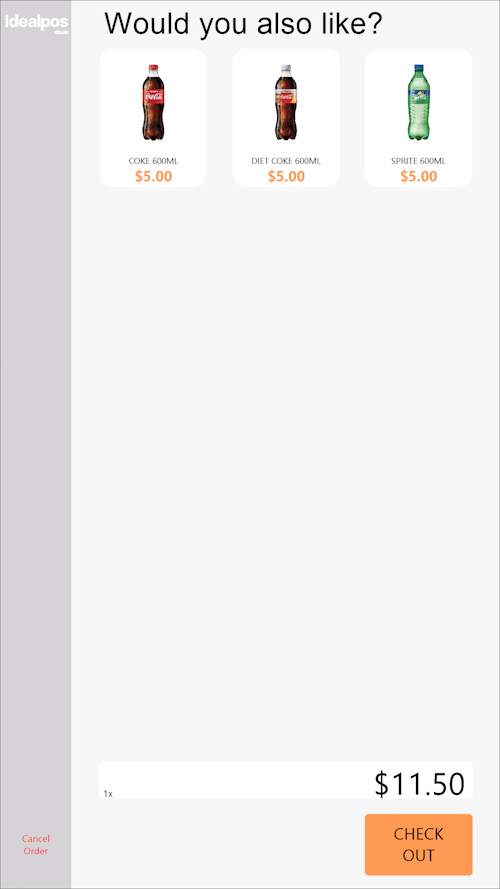
After adding an item from the Checkout Upsell Grid to the order, the Checkout Upsell Grid is displayed again and any other items from the grid can be added to the sale if required.
To proceed, press the "CHECK OUT" button > items in the order are displayed > Press "Pay by Card" to finalise > Kiosk takes payment and returns to the Home Screen.